반응형
Viewpager
- 데이터를 페이지 단위로 표시
- 페이지 전환이 가능
<?xml version="1.0" encoding="utf-8"?>
<RelativeLayout xmlns:android="http://schemas.android.com/apk/res/android"
    xmlns:app="http://schemas.android.com/apk/res-auto"
    xmlns:tools="http://schemas.android.com/tools"
    android:layout_width="match_parent"
    android:layout_height="match_parent"
    tools:context=".MainActivity">


    <LinearLayout
        android:id="@+id/llMenu"
        android:orientation="horizontal"
        android:layout_width="match_parent"
        android:layout_height="wrap_content">

        <Button
            android:id="@+id/btnY"
            android:text="노란색"
            android:layout_weight="1"
            android:layout_width="wrap_content"
            android:layout_height="wrap_content" />


        <Button
            android:id="@+id/btnP"
            android:text="핑크색"
            android:layout_weight="1"
            android:layout_width="wrap_content"
            android:layout_height="wrap_content" />


        <Button
            android:id="@+id/btnR"
            android:text="빨간색"
            android:layout_weight="1"
            android:layout_width="wrap_content"
            android:layout_height="wrap_content" />


    </LinearLayout>

    <androidx.viewpager.widget.ViewPager
        android:id="@+id/vpView"
        android:layout_below="@id/llMenu"
        android:layout_width="match_parent"
        android:layout_height="match_parent" />


</RelativeLayout>
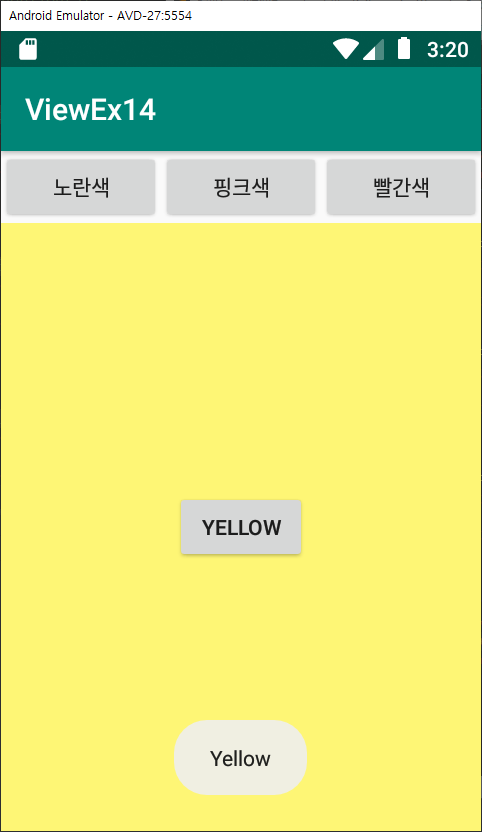
버튼 세 개를 만들고, 하단에 ViewPager를 뒀다.
<?xml version="1.0" encoding="utf-8"?>
<RelativeLayout xmlns:android="http://schemas.android.com/apk/res/android"
    android:layout_width="match_parent"
    android:layout_height="match_parent"
    android:background="#ff0000">

    <Button
        android:id="@+id/btnRed"
        android:text="Red"
        android:layout_centerHorizontal="true"
        android:layout_centerVertical="true"
        android:layout_width="wrap_content"
        android:layout_height="wrap_content"/>

</RelativeLayout>
버튼을 눌렀을 때 하단 페이지에 불러올 내용
package com.tistory.codedragon.viewex14;

import android.content.Context;
import android.os.Bundle;
import android.view.LayoutInflater;
import android.view.View;
import android.view.ViewGroup;
import android.widget.Button;
import android.widget.Toast;

import androidx.annotation.NonNull;
import androidx.appcompat.app.AppCompatActivity;
import androidx.viewpager.widget.PagerAdapter;
import androidx.viewpager.widget.ViewPager;

public class MainActivity extends AppCompatActivity {


    ViewPager myViewPager;

    int[] btn = {R.id.btnP, R.id.btnR, R.id.btnY};

    private View.OnClickListener myListener = new View.OnClickListener(){

        @Override
        public void onClick(View view) {

            switch(view.getId()){

                case R.id.btnY:
                    myViewPager.setCurrentItem(0);

                    break;

                case R.id.btnP:
                    myViewPager.setCurrentItem(1);
                    break;

                case R.id.btnR:
                    myViewPager.setCurrentItem(2);
                    break;
                case R.id.btnYellow:
                case R.id.btnRed:
                case R.id.btnPink:
                    String text = ((Button)view).getText().toString();

                    Toast.makeText(MainActivity.this, text, Toast.LENGTH_LONG).show();
                    break;
            }

        }

    };


    @Override
    protected void onCreate(Bundle savedInstanceState) {
        super.onCreate(savedInstanceState);
        setContentView(R.layout.activity_main);

        for( int id : btn){
            findViewById(id).setOnClickListener(myListener);
        }


        myViewPager = (ViewPager)findViewById(R.id.vpView);

        myViewPager.setAdapter(new MyPagerAdapter(MainActivity.this) );

    }


    private class MyPagerAdapter extends PagerAdapter{

        LayoutInflater myLayoutInflater;

        public MyPagerAdapter(Context context){
            myLayoutInflater = LayoutInflater.from(context);
        }

        @Override
        public int getCount() {
            return btn.length;
        }

        @Override
        public boolean isViewFromObject(@NonNull View view, @NonNull Object object) {
            return view==object;
        }

        @NonNull
        @Override
        public Object instantiateItem(@NonNull ViewGroup container, int position) {


            View v = null;

            switch (position){

                case 0:
                    v = myLayoutInflater.inflate(R.layout.page_yellow, null);
                    v.findViewById(R.id.btnYellow).setOnClickListener((myListener));

                    break;

                case 1:
                    v = myLayoutInflater.inflate(R.layout.page_pink, null);
                    v.findViewById(R.id.btnPink).setOnClickListener(myListener);

                    break;

                case 2:
                    v = myLayoutInflater.inflate(R.layout.page_red, null);
                    v.findViewById(R.id.btnRed).setOnClickListener(myListener);

                    break;

            }

            ((ViewPager)container).addView(v, 0);


            return v;


        } // instantiateItem


        @Override
        public void destroyItem(@NonNull ViewGroup container, int position, @NonNull Object object) {
//            super.destroyItem(container, position, object);
            ((ViewPager)container).removeView((View)object);
        }
    } //MyPagerAdapter


}
반응형
'자린고비 독학하기 > 자린고비 코딩하기' 카테고리의 다른 글
| C언어 - basic 01-10 (0) | 2019.08.28 |
|---|---|
| Android Studio - 진동, 효과음 / Snack Bar (0) | 2019.08.28 |
| Android Studio - FrameLayout (0) | 2019.08.22 |
| Android Studio - Relative Layout (0) | 2019.08.21 |
| Android Studio - Linear Layout: gravity / margin (0) | 2019.08.21 |

